Unleashing my inner Hemingway one passport stamp at a time; writing, exploring, photographing while celebrating the glory of middle age. Now where's my camera! :)
Travel photography equipment
This is an article aimed at assisting the everyday traveller to capture better travel photography, perhaps you're planning that first big trip away and pondering, what photography equipment should I take. Ok so I have 35 years of photography experience and have been lucky enough to have travelled to dozens of countries and foreign destinations. I've photograph with many different camera brands, types and sizes. Importantly, I have extensive experience with associated photography equipment such as tripods, lens, filters and the all-important camera bag. I've had great trips where everything went according to plan and I've had nightmares where I felt like it was just not worth it. During this article I'm going to mention several brands, these are the brands I've personally found to be superior in meeting my needs. As with all products, there are numerous options for the consumer and you may find another brand more to your liking. This article has not been sponsored in any way.
When moving through airports, you may be asked about your equipment, I’ve had the internal barrels of my lens inspected for drugs by customs in countries such as Singapore and the Middle East. Don’t carry small tools such as Allen or hex keys, screw drivers, etc. in your carry-on luggage as these will result in delays and be confiscated by most custom officers.
My camera bag of choice (after owning half a dozen) is Peak Design’s Everyday Backpack in the 30 litre size. It’s incredibly supportive, comfortable, highly-configurable and designed specifically for camera equipment. Plus it looks great! My back pack also accommodates up to a 15 inch laptop, water bottle, daily snacks, passport plus a dozen small pockets for those small items.
TIP: My number one travel rule is to ALWAYS carry your camera equipment with you at all times. When travelling, never put your important travel photography equipment in your check-in luggage, it can get damaged, lost or stolen in flight. Carry it with you and use the aircraft’s overhead locker space. I board the plane early to ensure I can stow my equipment directly overhead. When moving through airports, you may be asked about your equipment, I’ve had the internal barrels of my lens inspected for drugs in countries such as Singapore and in the Middle East. Don’t carry small tools such as Allen or hex keys, screw drivers, etc. in your carry-on luggage as these will be confiscated by most custom officers. If you need these tools, pack in your check-in luggage or purchase at your destination. There is no need to unpack your camera bag during baggage check, be polite and co-operative and you’ll have no issues - remember that travel photography is meant to be fun! To avoid delays and potential complications, tripods should be packed in check-in luggage and not carried onto the plane.
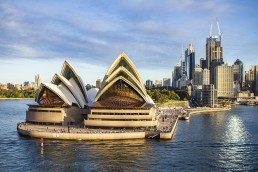
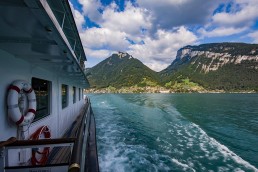
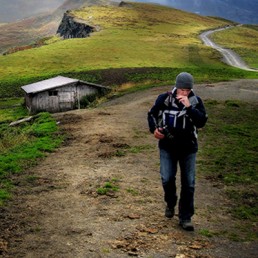
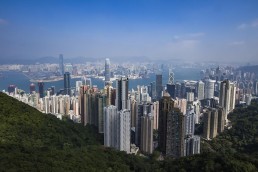
When it comes to camera selection for travel photography, there is no magical one size fits all option. It’s important to understand what you’ll be using your photography for. If you’re a travel blogger, then a decent compact camera will probably meet your needs. These are light and can easily fit in your pocket. If you're after some lovely memories of your trip to share with family and friends, then perhaps your trusty smartphone will be adequate. I’m a professional photographer and while I’ve travelled with light-weight ‘point and shoot’ cameras such as Canon IXUS range, I always return to DSLRs due to the unprecedented image quality and the control I have while photographing. For me, the extra weight is worth it, I currently travel with a single Canon 7D DSLR. I only carry 1 extra battery and charging unit. I have travelled with 2 DSLRs in the past, but the weight was too much. When it comes to long distance travel, such as flying from Australia to Europe, equipment weight and size is all-important. A day spent walking for 10-12 through the Swiss Alps can quickly turn into a negative experience if your equipment is too heavy and bulky.
What you're aiming for here is coverage over a broad focal length range as well as a decent overlap in your lens focal lengths.
In terms of lenses, I always carry 2 all-rounder versatile Canon pro L lens, focal lengths 24-105mm and 70-200mm. I also carry a 1.4x Canon L extender as it’s small, light and turns my 200mm into a 280mm, which has got me out of trouble more than once. I find carrying a larger telephoto lens too heavy and way too bulky. What you're aiming for here is coverage over a broad focal length range as well as a decent overlap in your lens focal lengths. If you can accommodate the extra weight, perhaps a Canon 11-24mm for super wide landscapes. If you’re using a compact camera, a Gorilla Grip tripod is an excellent tripod option. Although my 7D captures video, I carry a GoPro because they are super compact, light, take 4K video and can be used underwater. I always have an iPhone with me, they’re great for navigating, communication, research and they can also take half decent photos and videos.
In terms of associated equipment, this has to be kept at an absolute minimum as you can quickly add kilos to your travel kit. I currently travel with a super light Manfrotto 5 section tripod so it fits in my carry-on luggage suitcase, carbon fibre is the lightest and strongest. The compromise with a light tripod is reduced stability and they are not suitable for high wind conditions. As a result I’m always looking for ‘natural’ tripods, a fence post, wall, chair or even a rock for those low-light long exposure captures. Wheat bags can really help in these situations but I find them too heavy. If you’re going on a short trip, say a week, you need to plan and determine if you actually need a tripod. One way to compensate for the reduced stability of light-weight tripods is to use a remote, particularly when taking longer exposures. I use Canon’s RC-6 wireless remote which allows me to capture photos without touching the camera, its small, lightweight and avoids camera movement.